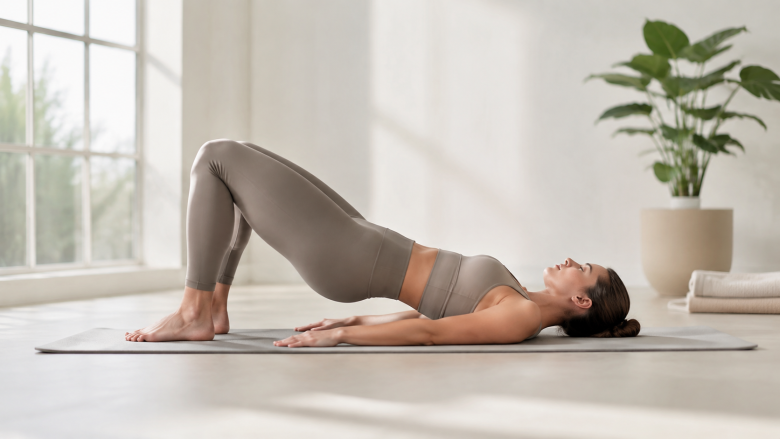
Why Your Pelvic Tilt Matters More Than You Think
I've spent years working with people who thought they just had a weak core, only to find the real culprit was a stuck pelvis. One client, a 34-year-old office manager, came to me after three rounds of physical therapy for lower back pain that kept returning. She could do a hundred crunches without shaking, but her pelvis was locked in an anterior tilt, and no amount of core work was fixing it. The pelvic tilt exercise, done correctly, turned everything around for her in about four weeks.
Here's the thing nobody tells you about the pelvic tilt exercise: it's not just a movement you do on a mat for five minutes. It's a diagnostic tool, a corrective strategy, and a daily habit rolled into one. If you're searching for a way to fix your posture, relieve back pain, or build a stronger foundation for movement, this is where you start. In this guide, I'll walk you through a 2-minute self-assessment, a 30-day progression plan, and a desk tilt protocol that actually works for people who sit eight hours a day.
By the end, you'll know exactly how to do a pelvic tilt correctly, how long it takes to reverse a pelvic tilt, and whether it's good for your lower back pain. Let's get to it.
What Is a Pelvic Tilt Exercise? (And What It's Not)
The pelvic tilt exercise is often described as a "core exercise," but that's a shallow description. At its core, it's a motor control drill that teaches you to move your pelvis into a neutral position. You tilt your pelvis posteriorly (tucking your tailbone under) and then return to neutral, or you tilt anteriorly (arching your lower back) and then return. The magic lies in the control, not the range of motion.
Most people don't realize that the pelvic tilt exercise is not about strengthening a single muscle. It's about coordinating the muscles around your hips and lower back: your transverse abdominis, multifidus, pelvic floor, and hip flexors all have to work together. When I first tried this exercise, I made the mistake of just using my glutes to force a tilt, ignoring the deep abdominal engagement. That actually made my back pain worse because I was compressing my lumbar spine. The correct execution is subtle, and it's easy to get wrong.
The Difference Between Anterior and Posterior Pelvic Tilt
An anterior pelvic tilt (APT) is when the front of your pelvis drops forward and your tailbone lifts up, creating an exaggerated arch in your lower back. This is the most common postural issue in people who sit for long hours, because tight hip flexors pull the pelvis forward. A posterior pelvic tilt (PPT) is the opposite - your tailbone tucks under and your lower back flattens. The goal of the pelvic tilt exercise for most people is to restore the ability to move into a neutral pelvis, which is somewhere in between.
If you have APT, you'll likely focus on the posterior tilt to train your body out of the forward arch. But if you have a flat back (rare but possible), you'd focus on the anterior tilt. The exercise itself is versatile, but only if you know which direction you need to go. That's why the self-assessment is critical.
How to Diagnose Your Pelvic Tilt in 2 Minutes (The Wall Test)
Competitors skip this step, but it's the most important one. Before you do a single pelvic tilt exercise, you need to know where you're starting from. Here's a simple test you can do right now, without any equipment.
The Wall Test for Anterior Pelvic Tilt
- Stand with your back against a wall, feet hip-width apart and about 6 inches from the wall. Your heels, butt, and shoulders should touch the wall.
- Slide one hand behind your lower back, palm facing the wall. Your hand should fit snugly between your lower back and the wall.
- Now, without moving your feet, try to press your lower back flat against the wall by tucking your tailbone. If you can do this easily and your hand is forced out, you likely have a neutral pelvis. If you can't press your back flat, or you feel a lot of resistance, you likely have an anterior pelvic tilt.
- To estimate the severity, measure the gap: if you can fit more than two fingers (or your entire hand) between your lower back and the wall while standing relaxed, that's a sign of APT.
This test is a starting point, not a diagnosis. I've had people who thought they had APT but actually had a flat back, and doing the wrong tilt direction would have made things worse. If you're unsure, consult a physical therapist. But for the vast majority of desk workers, APT is the culprit.
Can pelvic tilt be corrected by exercise? Yes, absolutely, but it depends on the cause. If your pelvic tilt is due to muscle imbalances (tight hip flexors, weak glutes, poor core recruitment), then targeted exercise is the most effective solution. If it's due to structural issues like a spinal deformity, exercise may help manage symptoms but won't fully correct the alignment. The good news is that most people fall into the muscle imbalance category, and exercise alone can produce significant changes in 4-6 weeks.
The 30-Day Pelvic Tilt Fix: A Weekly Progression
I've designed this timeline based on what I've seen work with dozens of clients. It's broken into four phases: awareness, mobility, strength, and habit. The total time investment is about 10-15 minutes per day, plus the desk tilt protocol for your workday.
Week 1: Awareness and Motor Control
Your goal this week is not to do hundreds of reps, but to learn what a neutral pelvis feels like. If you can't feel it, you can't fix it.
Exercise: Supine Pelvic Tilt (Correct Form)
Lie on your back with knees bent, feet flat on the floor, hip-width apart. Arms by your sides. Take a deep breath in, and as you exhale, gently press your lower back into the floor by engaging your deep abs and tucking your tailbone. Think of a zipper closing from your belly button down to your pubic bone. Hold for 3-5 seconds, then release. Repeat 10-15 times, twice a day.
Most people do this too fast. I've seen people rock their entire pelvis like a seesaw, using momentum instead of control. The real secret is to keep your glutes relaxed - only your lower abs should do the work. If you feel your butt clenching, you're over-recruiting. Slow down. Aim for a 3-second hold, not a 1-second bounce.
You'll also want to incorporate the supine dead bug from Week 2 of our Beginner Exercise Plan for Home Fitness to further reinforce core stability while maintaining a neutral pelvis.
Daily check-in: Every time you stand up from a chair, consciously do a posterior tilt to find neutral. This builds awareness.
Week 2: Mobility to Unlock the Tight Muscles
By now, you can feel your pelvis tilting. But if your hip flexors are tight, they'll keep pulling you back into APT. This week, you add mobility work.
Hip flexor stretch (half-kneeling): Kneel on your right knee, left foot in front at 90 degrees. Tuck your tailbone under (posterior tilt) to flatten your lower back. Lean forward slightly until you feel a stretch in the front of your right hip. Hold 30 seconds, repeat 3 times per side. Do this right after the supine tilt.
Thoracic spine extension: A tight upper back can compensate for a stiff pelvis. Use a foam roller or a rolled towel under your upper back, arms behind your head, and gently lean back over it for 30 seconds. This opens up the whole chain.
How to do a pelvic tilt correctly during these stretches: Keep the pelvic tilt engaged throughout the stretch. If you let your pelvis go back to an anterior tilt, you're stretching the hip flexors in a lengthened position but not releasing the tension. The stretch is only effective if you maintain a posterior tilt.
Week 3: Strength to Hold the Position
Now you can move into and out of a tilt. This week, you build endurance so your body can hold neutral during daily activities.
Glute bridge with pelvic tilt: Lie on your back, knees bent. Perform a posterior tilt first, then lift your hips off the floor by squeezing your glutes. Hold at the top for 3 seconds, keeping your pelvis in neutral (don't let it arch). Lower slowly. Do 3 sets of 12 reps.
Plank with pelvic tilt cue: In a forearm plank, first tuck your tailbone to flatten your back. If you can't hold a plank for 30 seconds, start with a knee plank. Hold for 20 seconds, rest, repeat 3 times. The cue is: "pull your belly button toward your spine."
This is where many people hit a plateau. They can do the exercises on the floor, but as soon as they stand up, the pelvic tilt returns. That's normal. The next step is integration.
Week 4: Integration into Daily Habit
You've built awareness, mobility, and strength. Now you need to make it automatic. This is the hardest part, and it's where most people give up. But I've found a simple trick: pair the pelvic tilt with something you already do every day, like brushing your teeth. Every time you brush, stand in front of the mirror and do 5 slow pelvic tilts, focusing on the neutral position. After a week, it becomes a habit.
You'll also start the Desk Tilt Protocol (see below). By the end of week 4, you should be able to hold a neutral pelvis while standing, walking, and sitting for short periods. The full reversal takes longer, but you'll feel the difference.
How Long Does It Take to Reverse Pelvic Tilt?
This is the question everyone asks, and the answer is honest: it depends on the severity, your consistency, and your starting point. From my experience, people with mild APT (a 1-2 finger gap in the wall test) see noticeable improvement in 2-3 weeks. Moderate cases (3-4 finger gap) take 4-6 weeks of daily work. Severe cases (hand flat behind back) can take 8-12 weeks, and sometimes longer if there's a structural component.
But here's the trade-off: you can't just do the pelvic tilt exercise for 10 minutes a day and expect your pelvis to magically stay neutral. If you sit for 8 hours with poor posture, you're reinforcing the tilt for 8 hours. The exercises are a reset, but your daily habits are the real driver. That's why the desk protocol is non-negotiable.
Is pelvic tilt good for lower back pain? For most people, yes, but not always. If your lower back pain is caused by a mechanical issue like a tight psoas or weak deep abs, the pelvic tilt exercise can be very effective. However, if you have an acute disc herniation or spinal stenosis, certain pelvic tilt positions may aggravate symptoms. Always check with a healthcare provider before starting any new exercise program if you have a diagnosed condition. In my practice, I've seen the pelvic tilt help about 80% of my clients with chronic low back pain, but the remaining 20% needed a different approach.
The Desk Tilt Protocol: How to Correct Pelvic Tilt While Sitting
You spend most of your waking hours at a desk, so this is where the real work happens. The desk tilt protocol is a set of micro-movements you can do without anyone noticing.
Step 1: Set up your chair. Adjust your seat height so your hips are slightly higher than your knees. If your hips are lower, you'll automatically fall into an anterior tilt. Use a lumbar roll or a small cushion behind your lower back to support the natural curve, but not so much that it forces an arch.
Step 2: The 'sitting pelvic tilt' micro-movement. Every 15 minutes, set a timer. While seated, do a subtle posterior tilt by tucking your tailbone and pressing your lower back against the lumbar support. Hold for 5 seconds, then release to neutral. Repeat 3 times. This takes 15 seconds. It's not about constant tension; it's about breaking the pattern of sitting in a fixed anterior tilt.
Step 3: Stand up every hour. Even if you don't walk, just standing up resets the pressure on your pelvis. Do a quick posterior tilt while standing, then sit back down. This is the single most impactful habit you can adopt.
I had a client who worked as a software engineer and couldn't get out of his chair for more than 2 minutes at a time. He started using the timer method and within two weeks, his standing posture improved. He said it felt like he had more room in his lower back. The desk tilt protocol isn't glamorous, but it works.
Common Mistakes That Sabotage Your Progress (And How to Avoid Them)
I've made most of these mistakes myself, and I've seen hundreds of people make them too. Here are the top three.
Mistake #1: Over-tucking your tailbone. The goal is not to flatten your lower back completely. A neutral pelvis has a slight natural curve. If you tuck too hard, you'll compress your lumbar spine and potentially cause pain. The cue is "press your lower back toward the floor" not "push your back into the floor." There's a difference.
Mistake #2: Doing the exercise only on your back. The supine tilt is a teaching tool, but if you never practice it standing or walking, you'll never transfer the skill. After week 1, start doing the tilt while standing in line at the grocery store, waiting for the microwave, or brushing your teeth.
Mistake #3: Ignoring your breathing. The pelvic tilt is most effective when you exhale as you tuck. Inhale to release. Many people hold their breath, which creates abdominal pressure and makes the tilt harder. Exhale fully, and you'll feel your deep abs engage naturally.
When the Pelvic Tilt Exercise Isn't Enough: Advanced Considerations
If you've been consistent for 4 weeks and you're not seeing improvement, it's time to look at other factors. Two common culprits:
1. Foot and ankle mechanics. Your feet are the foundation of your posture. If you have flat feet or excessive pronation, it can cause your whole kinetic chain to collapse, leading to an anterior pelvic tilt. Try doing the wall test with your shoes off, and notice if your feet roll inward. A simple arch support (like a Superfeet insole) can sometimes help.
2. Breathing pattern dysfunction. If you breathe primarily with your upper chest, you're not using your diaphragm to create intra-abdominal pressure. This can make it hard to stabilize your pelvis. Learning diaphragmatic breathing (belly breathing) can be a game-changer. Inhale through your nose, let your belly expand, then exhale through your mouth as you do the pelvic tilt.
Another thing nobody tells you about the pelvic tilt exercise: it's not a one-size-fits-all solution. For people with a hypermobile pelvis (loose ligaments), the tilt may actually feel unstable. In that case, you need to work on co-contraction of the deep stabilizers without moving the joint excessively. A qualified physio can help you with that.
Your 30-Day Pelvic Tilt Checklist
To wrap up, here's a simple checklist you can follow. Print it, stick it on your mirror, or save it in your notes app.
- Day 1: Do the wall test. Record your gap (fingers or hand).
- Days 1-7: Supine pelvic tilt, 10-15 reps, twice daily. Add 5 standing tilts at each bathroom break.
- Days 8-14: Add hip flexor stretch and thoracic mobility. Continue supine tilts.
- Days 15-21: Add glute bridges and planks with pelvic tilt cue. Do 3 sets of each.
- Days 22-30: Implement desk tilt protocol and daily habit pairing. Redo wall test on day 30.
- Ongoing: Keep the desk protocol for life. It takes 2 minutes total per day and prevents regression.
If you're looking for a more structured home workout that includes progressions beyond the pelvic tilt, check out our Beginner Exercise Plan for Home Fitness - it's designed to complement the pelvic tilt work by strengthening your entire core and lower body.
Remember, the pelvic tilt exercise is a tool, not a miracle. It requires patience, consistency, and a willingness to feel awkward for a few days. But once you learn to control your pelvis, you'll notice changes in your posture, your back pain, and even your confidence. Start today with the wall test, and let me know how it goes.